
|
|
Overview |
|
Removing DIMMs |
|
|
Installing DIMMs |
You can increase system memory up to 512 megabytes (MB) by using synchronous dynamic random-access memory (SDRAM) dual in-line memory modules (DIMMs). Figure 7 in "Inside Your Computer" shows the location of the DIMM sockets on the system board (DIMMs must be non-error checking and correction [ECC]).
When you add system memory, you may install DIMMs in either socket. For optimum operation, Dell recommends that you install a DIMM in socket A first (closest to the processor) before installing a DIMM in socket B.
To upgrade memory, perform the following steps.

|
CAUTION: To avoid the possibility of electric shock, turn off the computer and any peripherals, disconnect them from their electrical outlets, and then wait at least 5 seconds before you remove the computer cover. Also, before you upgrade memory, see the other precautions in "Safety First—For You and Your Computer. " |
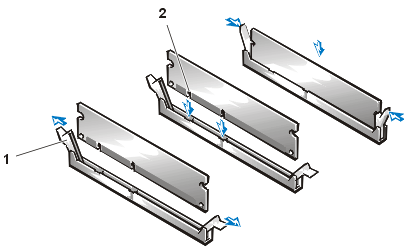
- Locate the plastic securing clips at each end of the socket (see Figure 1).
- Press the clips outward until they snap open.
- Press the DIMM straight into the slot running down the center of the socket until the securing tabs snap into place around the ends of the DIMM.
|
|

|
NOTE: After you remove and replace the cover,
the chassis intrusion detector causes the following message to appear on the screen
at the next system start-up: ALERT! Cover was previously removed. |
The system detects that the new memory does not match the existing system configuration information and generates the following message:
The amount of system memory has changed.
Strike the F1 key to continue, F2 to run the setup utility
The system should have already changed the value of System Memory to reflect the newly installed memory. Verify the new total. If it is correct, skip to step 7.
|
|
NOTE: If a setup password has been
assigned by someone else, contact your network administrator for information
on resetting the chassis intrusion detector. |
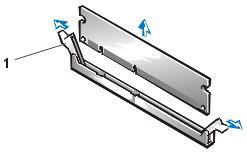
To remove a DIMM, press the securing clips outward simultaneously until the DIMM disengages and pops out slightly from the socket (see Figure 2).
|
|