Manuals

Manuals
Chassis Intrusion Switch: Dell OptiPlex GX50 Systems

Back to Contents Page

Chassis Intrusion Switch

Dell™ OptiPlex™ GX50 Systems

  Removing the Chassis Intrusion Switch

  Replacing the Chassis Intrusion Switch

  Resetting the Chassis Intrusion Detector


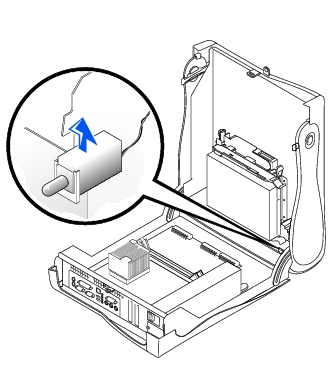
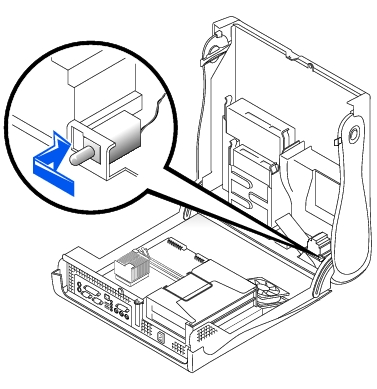
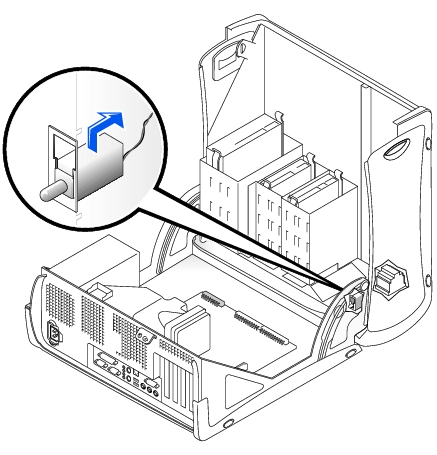
Removing the Chassis Intrusion Switch

Small Form-Factor Computer

Small Desktop Computer

Small Mini-Tower Computer

  1. Disconnect the chassis intrusion switch cable connector from the front I/O panel.

Note the routing of the chassis intrusion cable as you remove it from the chassis. Chassis hooks may hold the cable in place inside the chassis.

  1. Slide the chassis intrusion switch out of its slot and remove the switch and its attached cable from the chassis.


Replacing the Chassis Intrusion Switch

To replace the chassis intrusion switch, follow the "Removing the Chassis Intrusion Switch" procedures in reverse order.


Resetting the Chassis Intrusion Detector

  1. Enter system setup by pressing <F2> during the computer's POST.

NOTE: For instructions on using system setup, see the User's Guide.
  1. Under the System Security tab, reset the Chassis Intrusion option by pressing the left- or right-arrow key to select Reset. Change the setting to Enabled, Enabled-Silent, or Disabled.

NOTE: The default is Enabled-Silent.
NOTE: If a setup password has been assigned by someone else, contact the network administrator for information on resetting the chassis intrusion detector.
  1. Press <Alt><B> to restart the computer and implement your changes.


Back to Contents Page


Copyright 1999-2007 Dell Inc.
Battery Recall | About Dell | Conditions of Sale & Site Terms | Unresolved Issues | NEW Privacy Policy | Contact Us | Site Map | Feedback

Top
Large Text
sn AP28