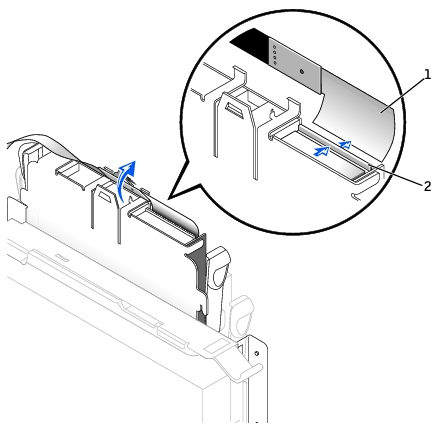
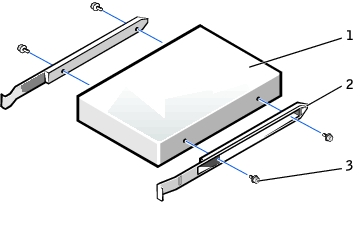
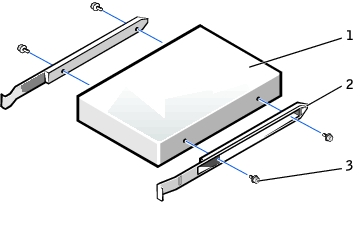
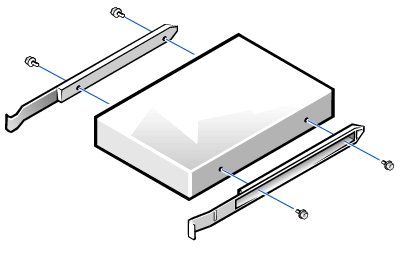
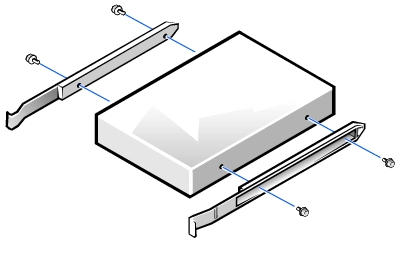
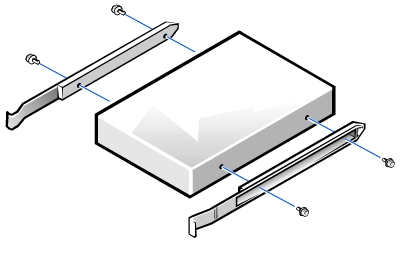
If the replacement drive does not have the bracket rails
attached, remove the rails from the old drive by removing the two screws that secure each
rail to the drive. Attach the bracket to the new drive by aligning the screw holes on the
drive with the screw holes on the bracket rails and tightening all four screws (two screws
on each rail).
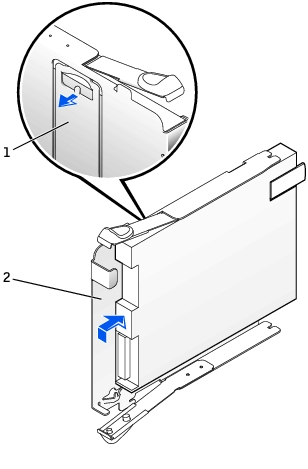
Floppy Drive Bracket Rails
1
Drive
2
Bracket rails (2)
3
Screws (4)
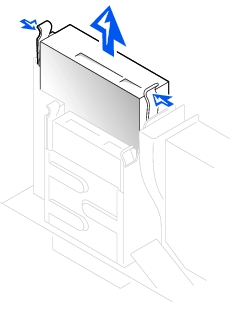
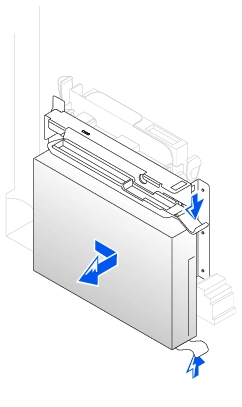
Gently slide the drive into place until the tabs
securely click into position.
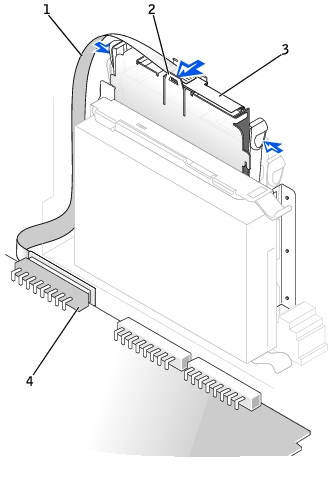
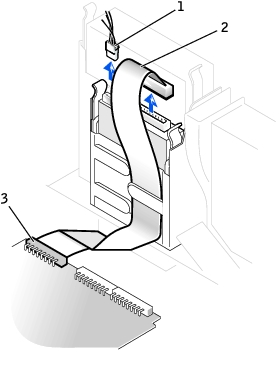
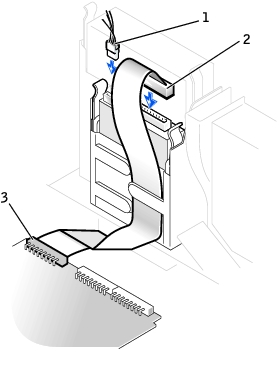
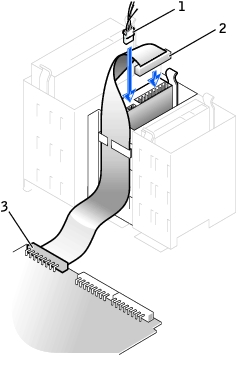
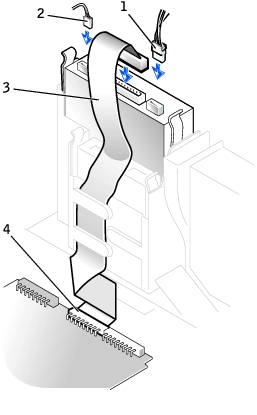
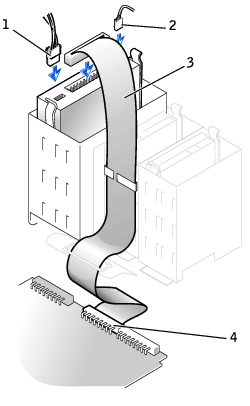
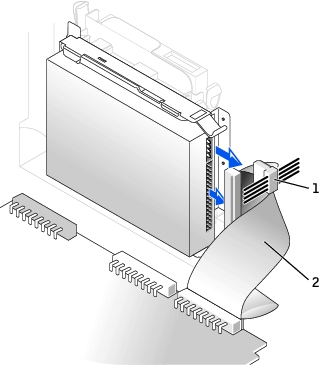
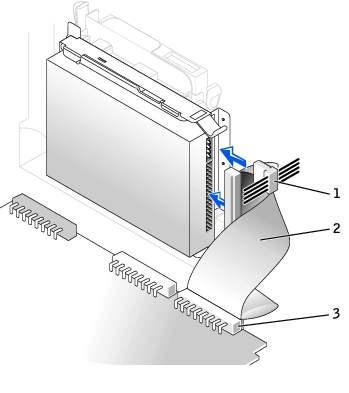
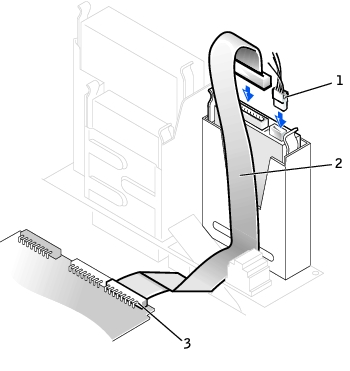
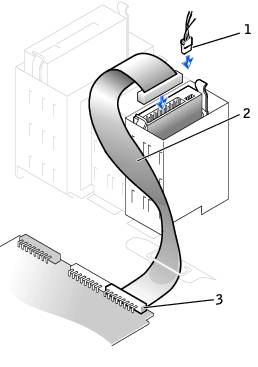
Attach the power and data cables to the floppy drive,
and connect the other end of the data cable to the connector labeled "DSKT" on
the system board.
Small Desktop Computer
1
Power cable
2
Floppy-drive cable
3
Floppy-drive system board connector
Small Mini-Tower Computer
1
Power cable
2
Floppy-drive cable
3
Floppy-drive system board connector
Check all cable connections, and fold cables out of the
way to provide airflow for the fan and cooling vents.
Close the computer cover, reconnect your computer and
devices to their electrical outlets, and turn them on.
Enter system setup and update the appropriate Diskette
Drive A option to reflect the size and capacity of your new floppy drive.
Verify that your computer works correctly by running the
Dell Diagnostics.
If you are replacing a drive that does not have the
bracket rails attached, remove the rails from the old drive by removing the two screws
that secure each rail to the drive. Attach the bracket to the new drive by aligning the
screw holes on the drive with the screw holes on the bracket rails and tightening all four
screws (two screws for each rail).
If you are installing a new drive, connect it to the set
of rails that are attached to the inside of the cover.
If a set of rails is not attached to the inside of the cover, contact
Dell.
Gently slide the drive into place until the tabs
securely click into position.
If you are installing a drive that has its own
controller card, install the controller card in an expansion slot.
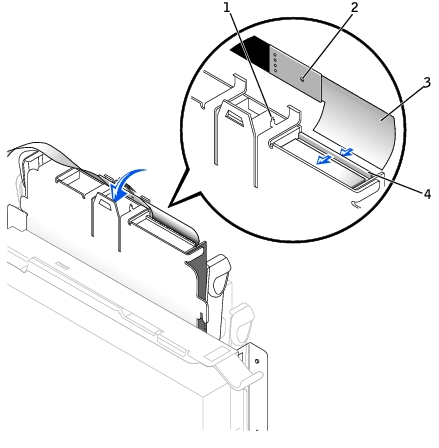
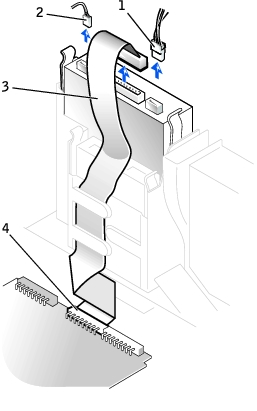
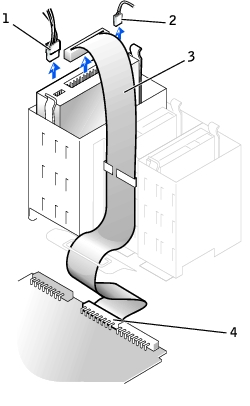
Connect the drive, power, and audio cables to the drive.
Connecting Cables—Small Desktop Computer
1
Power cable
2
Audio cable
3
CD drive cable
4
CD drive connector
Small Mini-Tower Computer
1
Power cable
2
Audio cable
3
CD drive cable
4
CD drive connector
If your computer came with an IDE CD drive, use the spare connector on
the existing interface cable. Otherwise, use the IDE interface cable provided in the drive
kit.
If you are installing a drive that has its own
controller card, install the controller card in an expansion slot.
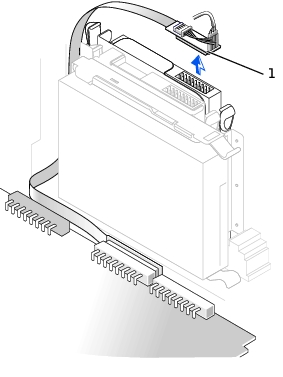
Disconnect the power and hard-drive data cables from the
drive.
Removing Cables—Small Form-Factor Computer
1
Power cable
2
Hard-drive cable
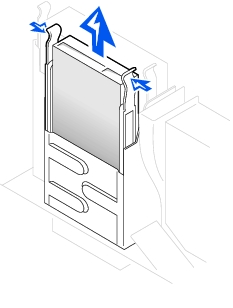
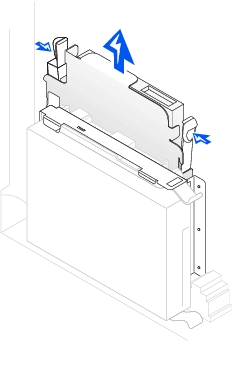
Press in on the tabs on each side of the drive and slide
the drive toward the I/O panel and remove it from the computer.
Removing the Hard Drive—Small Form-Factor Computer
If the replacement drive does not have the bracket rails
attached, remove the rails from the old drive by removing the two screws that secure each
rail to the drive.
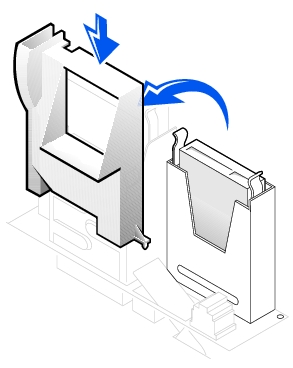
Remove the plastic shroud covering the hard drive by
pressing in on the indented tab at the top of the shroud and lifting the shroud away.
Removing the Shroud—Small Desktop Computer
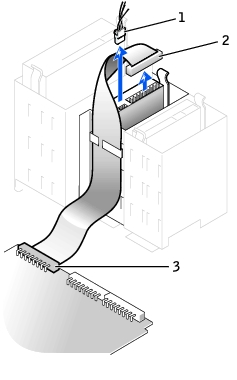
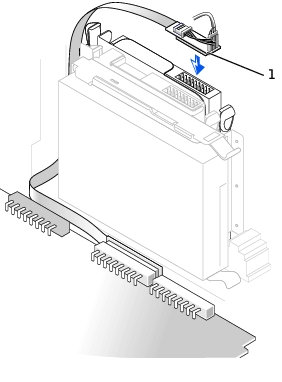
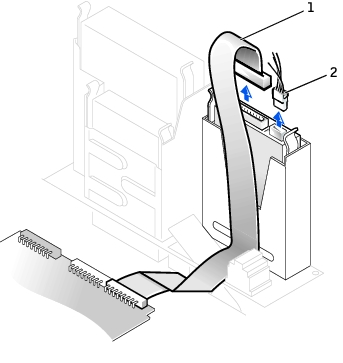
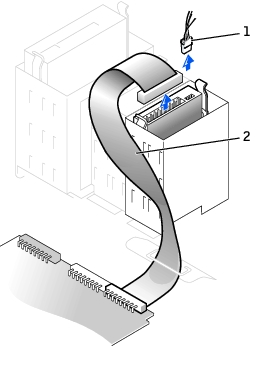
Disconnect the power and hard-drive data cables from the
drive.
Removing Cables—Small Desktop Computer
1
Hard-drive cable
2
Power cable
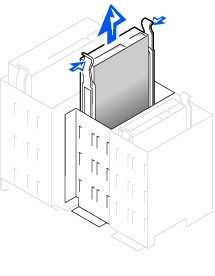
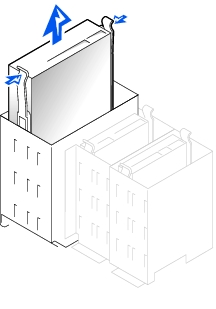
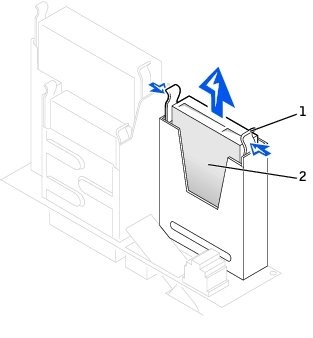
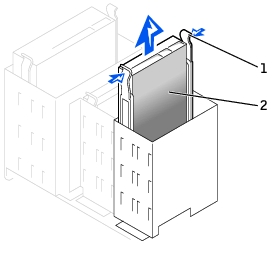
Press in on the tabs on each side of the drive and slide
it up and out.
Removing the Hard Drive—Small Desktop Computer
1
Tabs (2)
2
Hard drive
If the replacement drive does not have the bracket rails
attached, remove the rails from the old drive by removing the two screws that secure each
rail to the drive.
Disconnect the power and hard-drive data cables from the
drive.
Removing Cables—Small Mini-Tower Computer
1
Power cable
2
Hard-drive cable
Press in on the tabs on each side of the drive and slide
it up and out.
Removing the Hard Drive—Small Mini-Tower Computer
1
Tabs (2)
2
Hard drive
If the replacement drive does not have the bracket rails
attached, remove the rails from the old drive by removing the two screws that secure each
rail to the drive.
NOTICE: To avoid possibly
damaging the drive by ESD, ground yourself by touching an unpainted metal surface on the
back of the computer.
NOTICE: When you unpack the
drive, do not set it on a hard surface, which may damage the drive. Instead, set the drive
on a surface, such as a foam pad, that will sufficiently cushion it.
If the replacement drive does not have the bracket rails
attached, remove the rails from the old drive by removing the two screws that secure each
rail to the drive.
Reinstall the hard drive in the computer by gently
sliding the drive into place until you hear it securely click.
Connect the power and hard-drive data cables to the
drive.
On the small desktop computer, replace the hard-drive
shroud by inserting the two tabs on the bottom into the holes in the computer and snapping
the top into place.
Connecting Cables—Small Form-Factor Computer
1
Power cable
2
IDE cable
3
IDE1 connector
Connecting Cables—Small Desktop Computer
1
Power cable
2
IDE cable
3
IDE1 connector
Connecting Cables—Small Mini-Tower Computer
1
Power cable
2
IDE cable
3
IDE1 connector
Check all connectors to be certain that they are
properly cabled and firmly seated.
NOTICE: To avoid possible damage
to the computer, you must match the colored stripe on the hard-drive data cable with pin 1
on the hard-drive (IDE1) connector and with the system board interface connector (IDE1).
Partition and logically format the computer's hard
drive before proceeding to the next step.
For partition and format instructions, refer to the documentation that
came with the operating system.
NOTE: On Windows NT computers
with hard drives larger than 2 GB, create a primary partition of 2 GB and divide the
remaining capacity into partitions of 2 GB or less. For example, a computer with a 2.5-GB
hard drive would have a primary partition of 2 GB (drive C) and a second partition of 500
MB (drive D).
Test the hard drive by running the Dell Diagnostics.
See "Solving Problems" in the User's Guide for complete
information.
If the drive you just installed is the primary drive,
install the operating system on the hard drive.
For instructions, refer to the documentation that came with the
operating system.